Hercules (Hyperion)
The emulator needed to run IBM mainframe bits is called “Hercules” and has gone through a LOT of evolution through the many years of its existence.
The primary maintainer of the current version is David Trout (a.k.a. “Fish”) of SoftDev Labs.
His code is excellent and he maintains the current version of the emulator on Github under the SDL-Hercules-390 project.
David describes the build process on the SDL web page Hercules Build Instructions but as easy as it looks, it's not for all the reasons described here. I've annotated his work for clarity (and reality) of what it takes to get this built properly under Windows - and to be clear, the complexity is in getting the LIBRARIES working properly since his instructions point to builds of utility libraries that are over 10 years old.
Because we're not concerned with the older Visual Studio implementations, I'm only concerned with my build environment VS2022.
Also - because the use of the IDE actually gets in the way of a fast build - I am limiting my remediation instructions to the command prompt makefile.bat build.
SPECIAL NOTE: The build of Hercules requires WIN32.MAK which is a deprecated, but available feature in VS2022
(for the original Visual Studio 2008 instructions, click here which will take you to the SoftDevLabs web site.)
Hercules (Hyperion) Windows Build Instructions
(Visual Studio 2022)
Introduction
EVERYTHING in this document assumes you are running Windows 10 or Windows 11
This document provides instructions on how to build the Windows “MSVC” version of SDL Hercules 4.x Hyperion. It parallels David Trout's version of the document but points out the “reality” of what is needed to setup for an updated build of Hercules.
SDL did a great job of constructing the build process and fully utilizing the MSBUILD machinery - it's textbook … The challenges were in doing a proper complete build without the use of libraries which he provided.
Those libraries were built in 2008 and because I don't want and don't have the sources for any libraries that old (I use the same library builds across all projects), the fun starts when it comes time to update the dependent libraries (as of this writing):
Dependencies
Significant functionality is provided by these three optional libraries. But the majority of the features I will require depend upon them… so for this process, they are required.
- PCRE FTP Perl Compatible Regular Expressions is a very sophisticated regular expression library. PCRE support is required in order to build the Hercules Automated Operator functionality. The PCRE library is a set of functions that implement regular expression pattern matching using the same syntax and semantics as Perl 5.
There are two major versions of the PCRE library:
- The current version, PCRE2, first released in 2015, is now at version 10.35
- The older, but still widely deployed PCRE library, originally released in 1997, is at version 8.44. Its API and feature set are stable—future releases will be for bugfixes only. Any new features will be added to PCRE2, and not to the PCRE 8.x series. The current version is 8.44 This build example uses PCRE 8.44.
- BZIP2 The bzip2 file compression program was developed by Julian Seward and launched on the 18th of July in 1996. It has remained an open source program, available to all for free, for over twenty two years now. The last stable release was seven years ago. The version 1.0.6 was released on the 20th of September in 2010. bzip2 compression program is based on Burrows–Wheeler algorithm. The current version is 1.0.6.
THE PCRE MODULE: creates complexity in revising the build because SDL's instruction conveniently include links to binaries which are very old and refer to the UNIX names ofpcre3.(lib|dll)which is confusing to anyone trying to build the libraries today. More on this later …
To build the Windows MSVC version of Hercules you need to first download and install Microsoft's free (Free, fully-featured IDE for students, open-source and individual developers) Visual Studio Community 2019 product.
To build the DEPENDENCIES you will need to Download and Install CMAKE.
Summary of Steps Involved
The overall setup of the build environment indicated above is straightforward but incomlete. SDL indicates the 5 steps necessary for Hercules and assumes that you use their pre-built libraries. Before doing anything - it's important to have a proper build structure ready.
Choose your build location and GIT/Clone the working directories:
git clone https://github.com/SDL-Hercules-390/hyperion.git
The resulting development tree (after following all of the subsequent steps) will look like this:
Because we are building not only Hercules, but the dependencies as well the more precise required steps are:
- Download and install Visual Studio 2022.
- Define the
INCLUDEandVS170COMNTOOLSenvironment variables, and fix Visual Studio's “Default Property Sheets”. - Download/UnZip/Position the following pre-built libraries from SDL so the original build functionality can be adequately tested using the defaults:
If you intend to build the “Current Libraries” - these additional steps will be required:
- Copy the folder structure for all three libraries (we assume the defaults of
winbuildnoted above) - Copy the makefile structure and give it a proper identifier (we are using
szin this context)
If you decide to locate those packages OUTSIDE of the build tree, you may indicate their proper location through the use of environment variables:
SET ZLIB_DIR=<UnQuotedDirectoryLocation>SET BZIP2_DIR=<UnQuotedDirectoryLocation>SET PCRE_DIR=<UnQuotedDirectoryLocation>
It is important to note that the subordinate structures must match the hierarchy indicated above.
Detailed Activity Steps
1. Download and Install Visual Studio
Click the download button for the “Community” edition from the Visual Studio download web page using the above link to download a small installer stub. Run the installer and select which components you wish to install, and then let the installer install your selected components.
The install takes quite a while to finish, so get yourself a cup of coffee while you wait.
IMPORTANT!
You must select the “C++ Windows XP Support for VS 2017 (v141) tools [Deprecated]” option!

Once Visual Studio is installed, you will need to do make important configuration changes:
- You need to manually define very important environment variables
- Fix Visual Studio's “Default Property Sheets” to add the INCLUDE directories specifying the location of the
win32.makfile installed by the above installation option. This will be more clearly explained in the next step.
2. Define Environment Variables and Fix Property Sheets
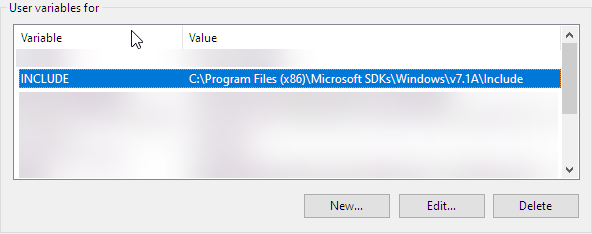
INCLUDE
The INCLUDE environment variable must be defined because it identifies the location of an additional list of compiler search directories. This must indicate the directory where the “win32.mak” file was installed. (The “Windows XP support” install option is what provided the “win32.mak”.) This directory varies depending on the version of Visual Studio installed and where it was installed, but for most people it will be:
C:\Program Files (x86)\Microsoft SDKs\Windows\v7.1A\Include
VSnnnCOMNTOOLS
The VSnnnCOMNTOOLS environment variable must also be defined (where 'nnn' is the internal version number of Visual Studio)
- '140' for Visual Studio 2015
- '150' for Visual Studio 2017
- '160' for Visual Studio 2019
- '170' for Visual Studio 2022
In earlier versions of Visual Studio the installer automatically defined this environment variable for you, but in later versions of Visual Studio the installer no longer provides this. Because we require this variable for the automatic/batch build process, it will need to be defined.
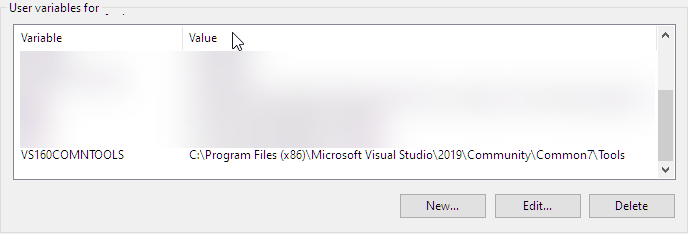
This value identifies the location of the Visual Studio “Common Tools” directory. These tools enable the build routine makefile.bat to locate the necessary configuration files which initialize Visual Studio's build environment.
For most people this directory will be:
C:\Program Files (x86)\Microsoft Visual Studio\yyyy\Community\Common7\Tools
For Visual Studio 2022, the directory is most likely to be:
C:\Program Files\Microsoft Visual Studio\2022\Community\Common7\Tools
where 'yyyy' is of course the version of Visual Studio (“2015”, “2017”, “2019”, “2022”).
Option 1: Change Default Property Sheets
Place the following file, or edit its contents, into the file:
C:\Users\<userProfileName>\AppData\Local\Microsoft\MSBuild\v4.0\Microsoft.Cpp.x64.user.props
- Microsoft.Cpp.x64.user.props
<?xml version="1.0" encoding="utf-8"?>
<Project DefaultTargets="Build" ToolsVersion="4.0" xmlns="http://schemas.microsoft.com/developer/msbuild/2003">
  <ImportGroup Label="PropertySheets">
  </ImportGroup>
  <PropertyGroup Label="UserMacros" />
  <PropertyGroup>
    <IncludePath>$(VC_IncludePath);$(WindowsSDK_IncludePath);$(INCLUDE);</IncludePath>
  </PropertyGroup>
  <ItemDefinitionGroup />
  <ItemGroup />
</Project>
Option 2: Change Default Property Sheets
NOTE: This task must be done in ELEVATED mode because it modifies installed Program files.
Finally, we must modify Visual Studio's “Default Property Sheets”; one for 32-bit and another for 64-bit.
These property sheets contain the defaults which are used by MSBUILD and tell Visual Studio how to initialize its various configuration values. Visual Studio does not (by default) include directories identified by the INCLUDE environment variable. These modification enable the capability.
The Default Installation contains the following toolset.props property files:
- C:\Program Files\Microsoft Visual Studio\2022\Community\MSBuild\Microsoft\VC\v150\Platforms\Win32\PlatformToolsets\v141\Toolset.props
- C:\Program Files\Microsoft Visual Studio\2022\Community\MSBuild\Microsoft\VC\v150\Platforms\Win32\PlatformToolsets\v141_xp\Toolset.props
- C:\Program Files\Microsoft Visual Studio\2022\Community\MSBuild\Microsoft\VC\v150\Platforms\x64\PlatformToolsets\v141\Toolset.props
- C:\Program Files\Microsoft Visual Studio\2022\Community\MSBuild\Microsoft\VC\v150\Platforms\x64\PlatformToolsets\v141_xp\Toolset.props
- C:\Program Files\Microsoft Visual Studio\2022\Community\MSBuild\Microsoft\VC\v160\Platforms\ARM\PlatformToolsets\v142\Toolset.props
- C:\Program Files\Microsoft Visual Studio\2022\Community\MSBuild\Microsoft\VC\v160\Platforms\Win32\PlatformToolsets\v142\Toolset.props
- CC:\Program Files\Microsoft Visual Studio\2022\Community\MSBuild\Microsoft\VC\v160\Platforms\x64\PlatformToolsets\v142\Toolset.props
If you have other toolchains installed - you may need to locate them:
- C:\Program Files (x86)\MSBuild\Microsoft.Cpp\v4.0\v140\Platforms\ARM\PlatformToolsets\v140\Toolset.props
- C:\Program Files (x86)\MSBuild\Microsoft.Cpp\v4.0\v140\Platforms\Win32\PlatformToolsets\v140\Toolset.props
- C:\Program Files (x86)\MSBuild\Microsoft.Cpp\v4.0\v140\Platforms\Win32\PlatformToolsets\v140_xp\Toolset.props
- C:\Program Files (x86)\MSBuild\Microsoft.Cpp\v4.0\v140\Platforms\x64\PlatformToolsets\v140\Toolset.props
- C:\Program Files (x86)\MSBuild\Microsoft.Cpp\v4.0\v140\Platforms\x64\PlatformToolsets\v140_xp\Toolset.props
We are only concerned with these three:
- C:\Program Files (x86)\MSBuild\Microsoft.Cpp\v4.0\v140\Platforms\ARM\PlatformToolsets\v140\Toolset.props
- C:\Program Files (x86)\MSBuild\Microsoft.Cpp\v4.0\v140\Platforms\Win32\PlatformToolsets\v140\Toolset.props
- C:\Program Files (x86)\MSBuild\Microsoft.Cpp\v4.0\v140\Platforms\x64\PlatformToolsets\v140\Toolset.props
Backup/rename the originals to:
- C:\Program Files (x86)\MSBuild\Microsoft.Cpp\v4.0\v140\Platforms\ARM\PlatformToolsets\v140\Toolset.props.original
- C:\Program Files (x86)\MSBuild\Microsoft.Cpp\v4.0\v140\Platforms\Win32\PlatformToolsets\v140\Toolset.props.original
- C:\Program Files (x86)\MSBuild\Microsoft.Cpp\v4.0\v140\Platforms\x64\PlatformToolsets\v140\Toolset.props.original
Then modify them as illustrated here:

NOTE: The “INCLUDE” environment variable we defined earlier above is very important in that it defines the location where the “win32.mak” file lives which Hercules needs to initialize its build settings. We place it in its own environment variable because the “INCLUDE” environment variable is defined as a semicolon-delimited list of directories to be searched, and thus can contain other additional directories to be searched. Each development toolchain behaves differently so we have modified Visual Studio's default behavior in such a way that our build work can be more flexible.
As you can see, all we are doing is appending the “$(INCLUDE)” directories to the end of Visual Studio's default search directories. This enables Visual Studio to locate the critical “win32.mak” file when the build procedure asks for it.
Once you have Visual Studio installed and have defined the two environment variables and fixed the Property Sheets, then you are finished with the Visual Studio installation portion of the setup.
SPECIAL INSTRUCTIONS FOR WINDOWS 10 and 11:
Before your newly defined environment variables can take effect, you will need to first logoff and then log back on! Earlier versions of Windows are smart enough to dynamically update the environment immediately after being modified, but Windows 10 is different! You have to logoff and logon again (or reboot) before the new environment variables will take effect!
3. Setting up ZLIB Support
ZLIB is a compression algorithm written by Jean Loup Gailly and Mark Adler and may be used in the Hercules project pursuant to the ZLIB License (a copy of which may be seen at http://www.zlib.net/zlib_license.html).
In source form, the Hercules project does not contain any ZLIB source code.
In binary form however, the Hercules project may include an unmodified version of the ZLIB runtime DLL in addition to its own distribution binaries.
The 'ZLIB_DIR' environment variable defines the location of where the required files are for building a version of Hercules that supports ZLIB compression. The makefile.bat and related MSBuild files used by the Hercules build process test whether this environment variable is defined as an indicator to build ZLIB compression support into Hercules.
If 'ZLIB_DIR' is undefined when you invoke the makefile the MSBuild functionality attempts to find the required files in a predefined default directory winbuild. If the MSBuild functionality cannot find them, then ZLIB support will not be generated. Otherwise 'ZLIB_DIR' must point to a valid directory where the ZLIB package is installed and that directory MUST have the following structure:
ZLIB_DIR must contain the top path of the ZLIB directory.
When building a 64-bit (x64) version of Hercules the above 'x64' subdirectories are automatically searched. As long as the above directory structure is observed then Hercules ZLIB functionality will be included.
The SDL-provided Library distribution expected within this structure is:
3.A Setting up ZLIB "Current Library" Support
If your build requires the “Current Version” libraries, the resulting hierarchy will be substantially different than the one required for Hyperion/Hercules. It is for this reason that you should BUILD the libraries separately, and then move them into place using the established hierarchy indicated above.
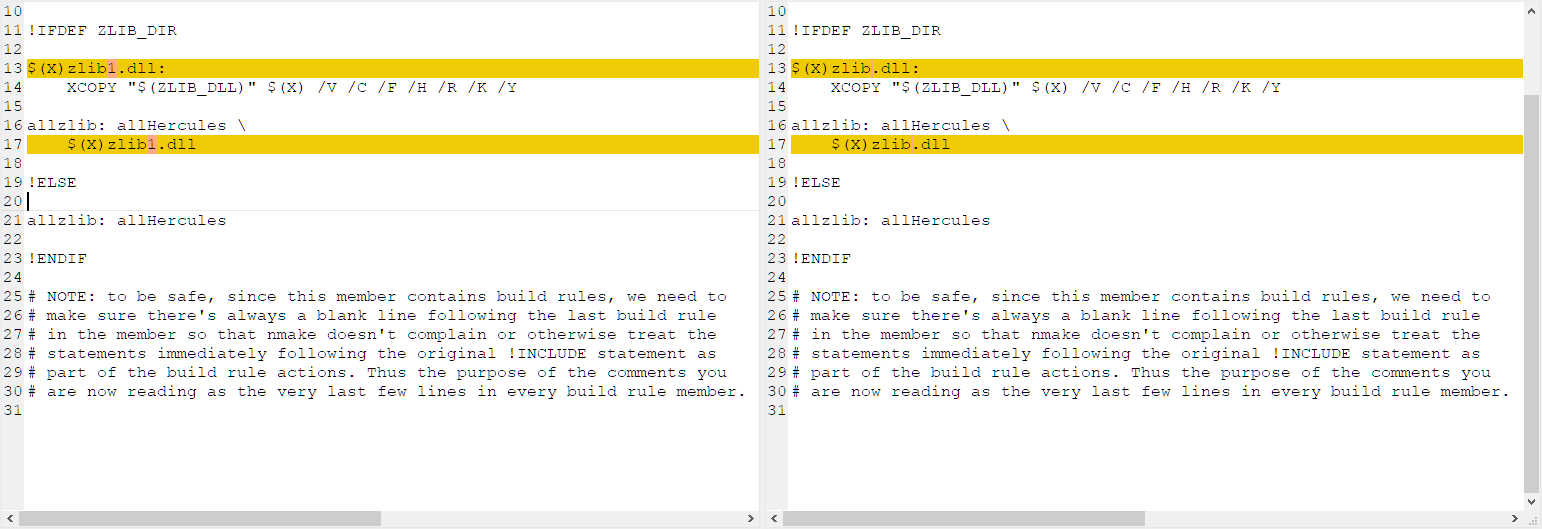
For ZLIB, the required hierarchy using ZLIB's present-day build mechanism on windows requires that you copy the files from their build directory structure into the following hierarchy:
and you will then need to modify the MSVC files accordingly:
hyperion\msvc.makefile.sz.includes\ZLIB_DIR.msvc
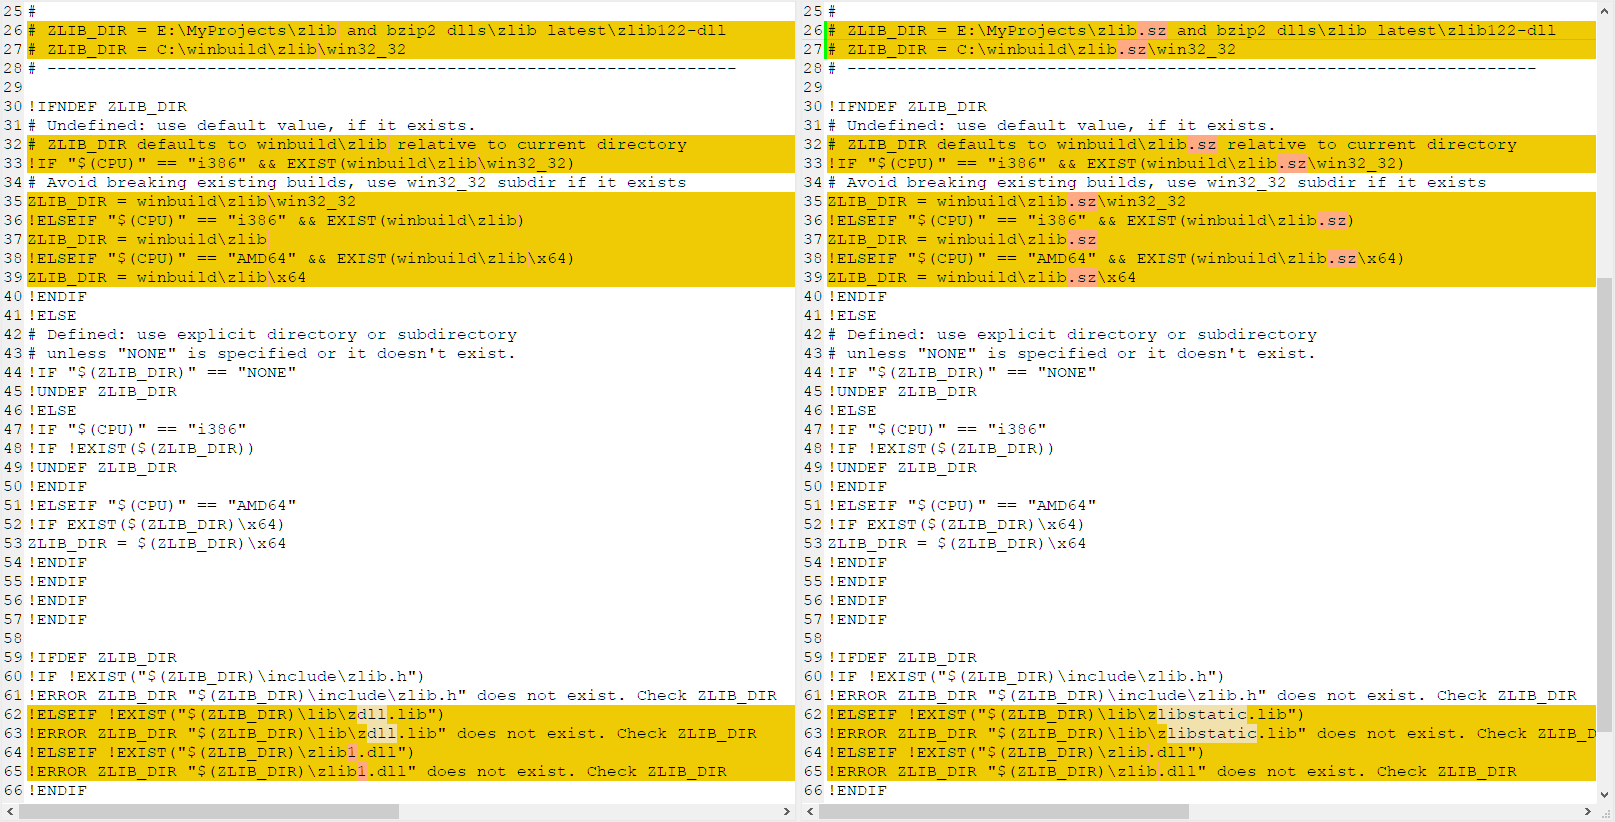
hyperion\msvc.makefile.sz.includes\ZLIB_FLAGS.msvc
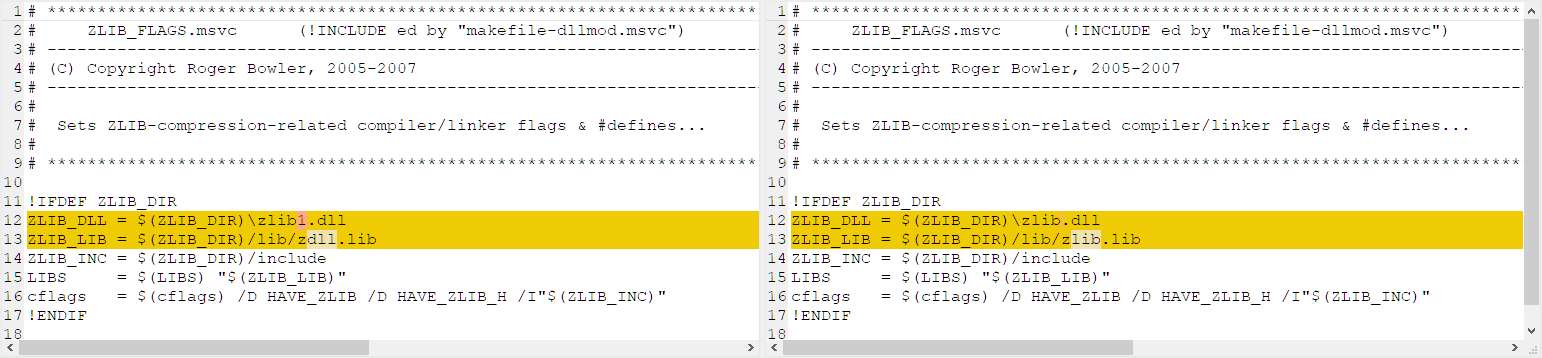
hyperion\msvc.makefile.sz.includes\ZLIB_RULES.msvc
4. Setting up BZIP2 Support
BZIP2 is a freely available (open-source (BSD-style) license), patent free (as far as the author knows), high-quality data compressor written by Julian R Seward. It typically compresses files to within 10% to 15% of the best available techniques (the PPM family of statistical compressors), whilst being around twice as fast at compression and six times faster at decompression.
In source form, the Hercules project does not contain any BZIP2 source code.
In binary form however, the Hercules project may include an unmodified version of the BZIP2 runtime DLL in addition to its own distribution binaries.
The 'BZIP2_DIR' environment variable defines the location of where the required files are for building a version of Hercules that supports BZIP2 compression. The makefile.bat and related MSBuild files used by the Hercules build process test whether this environment variable is defined as an indicator to build BZIP2 compression support into Hercules.
If 'BZIP2_DIR' is undefined when you invoke the makefile the MSBuild functionality attempts to find the required files in a predefined default directory winbuild. If the MSBuild functionality cannot find them, then BZIP2 support will not be generated. Otherwise 'BZIP2_DIR' must point to a valid directory where the BZIP2 package is installed and that directory MUST have the following structure:
ZLIB_DIR must contain the top path of the ZLIB directory.
When building a 64-bit (x64) version of Hercules the above 'x64' subdirectories are automatically searched. As long as the above directory structure is observed then Hercules ZLIB functionality will be included.
The SDL-provided Library distribution expected within this structure is:
4.A Setting up BZIP2 "Current Library" Support
If your build requires the “Current Version” libraries, the resulting hierarchy will be substantially different than the one required for Hyperion/Hercules. It is for this reason that you should BUILD the libraries separately, and then move them into place using the established hierarchy indicated above.
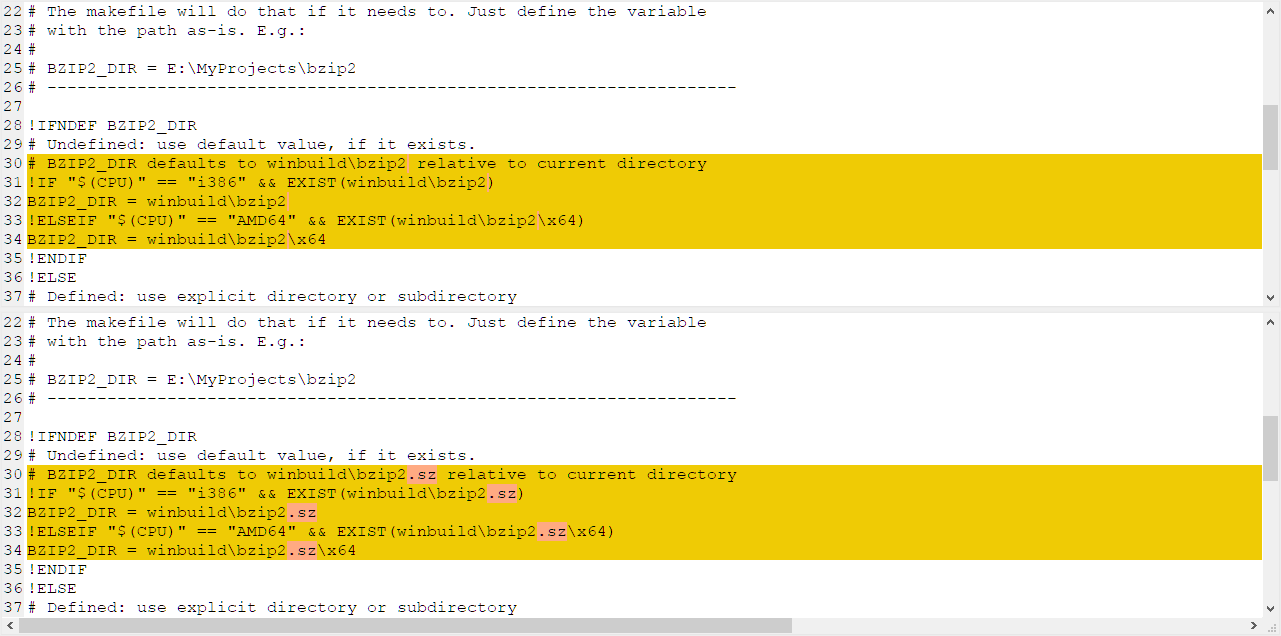
For ZLIB, the required hierarchy using ZLIB's present-day build mechanism on windows requires that you copy the files from their build directory structure into the following hierarchy:
and you will then need to modify the MSVC files accordingly:
hyperion\msvc.makefile.sz.includes\BZIP2_DIR.msvc
5. Setting up PCRE Support
NOTE: the Perl-Compatible Regular Expressions library is needed only to support the Hercules Automatic Operator (HAO) Facility. If you do not plan to ever use the Hercules Automatic Operator facility, then you do not need to install PCRE support and may safely skip this step.
PCRE (Perl-Compatible Regular Expressions) is: “a set of functions that implement regular expression pattern matching using the same syntax and semantics as Perl 5. PCRE has its own native API, as well as a set of wrapper functions that correspond to the POSIX regular expression API. The PCRE library is free, even for building commercial software.”
In source form, the Hercules project does not contain any PCRE source code.
In binary form however, the Hercules project may include an unmodified version of the PCRE runtime DLL in addition to its own distribution binaries.
The 'PCRE_DIR' environment variable defines the location of where the required files are for building a version of Hercules that supports PCRE compression. The makefile.bat and related MSBuild files used by the Hercules build process test whether this environment variable is defined as an indicator to build PCRE compression support into Hercules.
If 'PCRE_DIR' is undefined when you invoke the makefile the MSBuild functionality attempts to find the required files in a predefined default directory winbuild. If the MSBuild functionality cannot find them, then PCRE support will not be generated. Otherwise 'PCRE_DIR' must point to a valid directory where the PCRE package is installed and that directory MUST have the following structure:
PCRE_DIR must contain the top path of the PCRE directory.
When building a 64-bit (x64) version of Hercules the above 'x64' subdirectories are automatically searched. As long as the above directory structure is observed then Hercules PCRE functionality will be included.
The SDL-provided Library distribution expected within this structure is:
5.A Setting up PCRE "Current Library" Support
If your build requires the “Current Version” libraries, the resulting hierarchy will be substantially different than the one required for Hyperion/Hercules. It is for this reason that you should BUILD the libraries separately, and then move them into place using the established hierarchy indicated above.
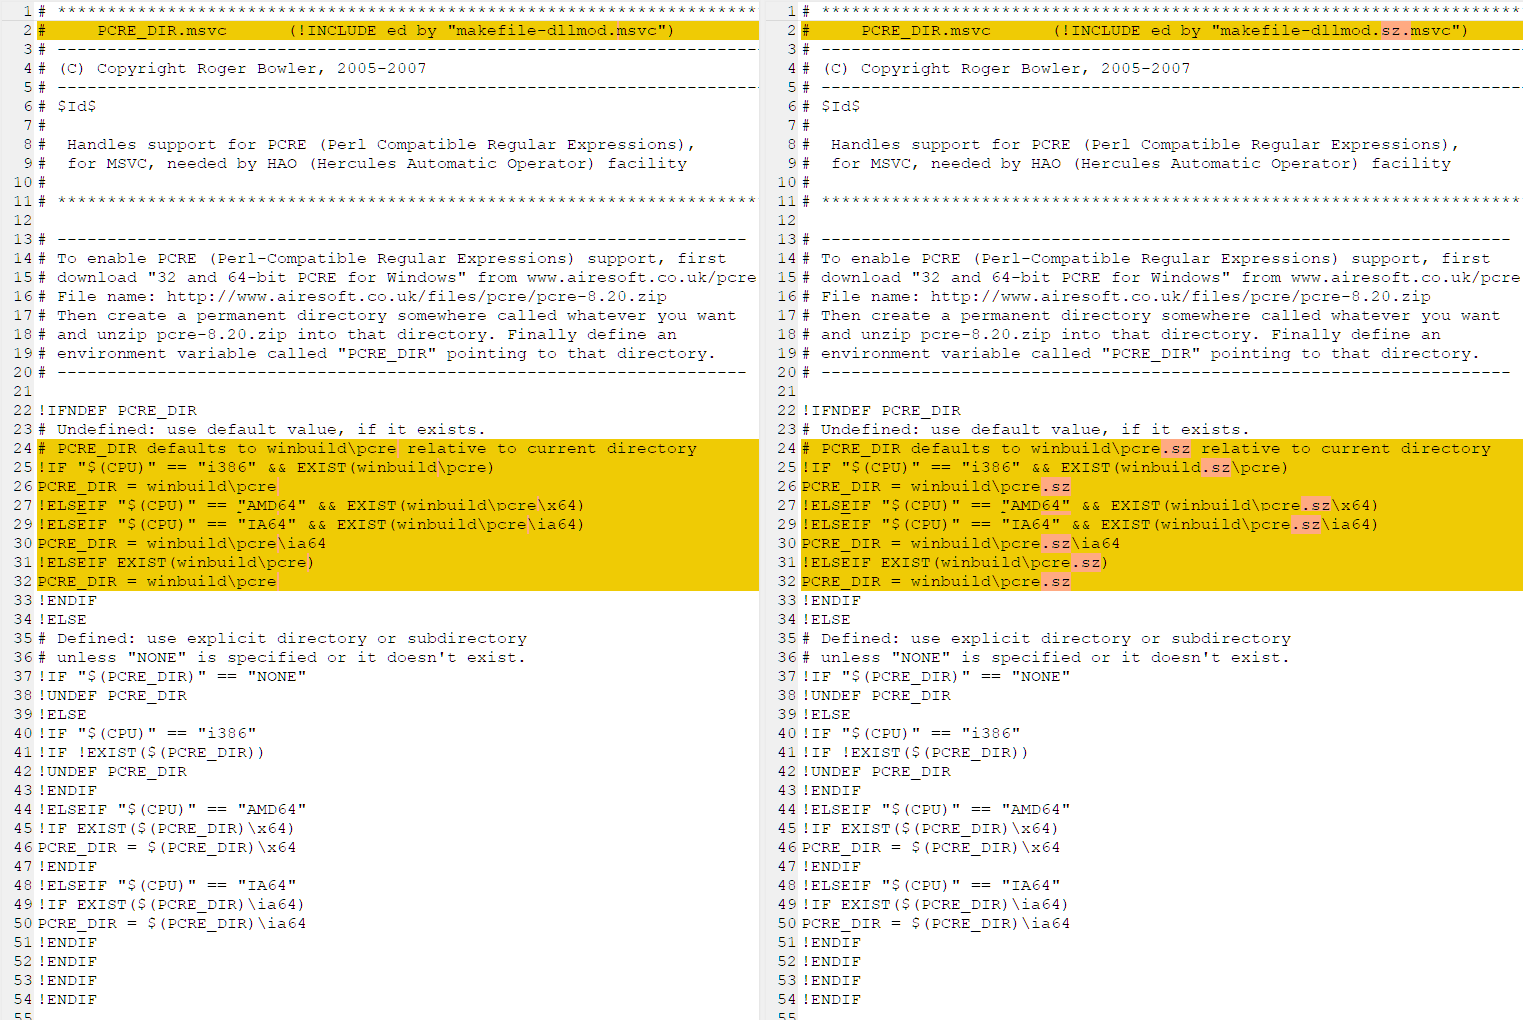
For PCRE, the required hierarchy using PCRE's present-day build mechanism on windows requires that you copy the files from their build directory structure into the following hierarchy:
and you will then need to modify the MSVC files accordingly:
hyperion\msvc.makefile.sz.includes\PCRE_DIR.msvc
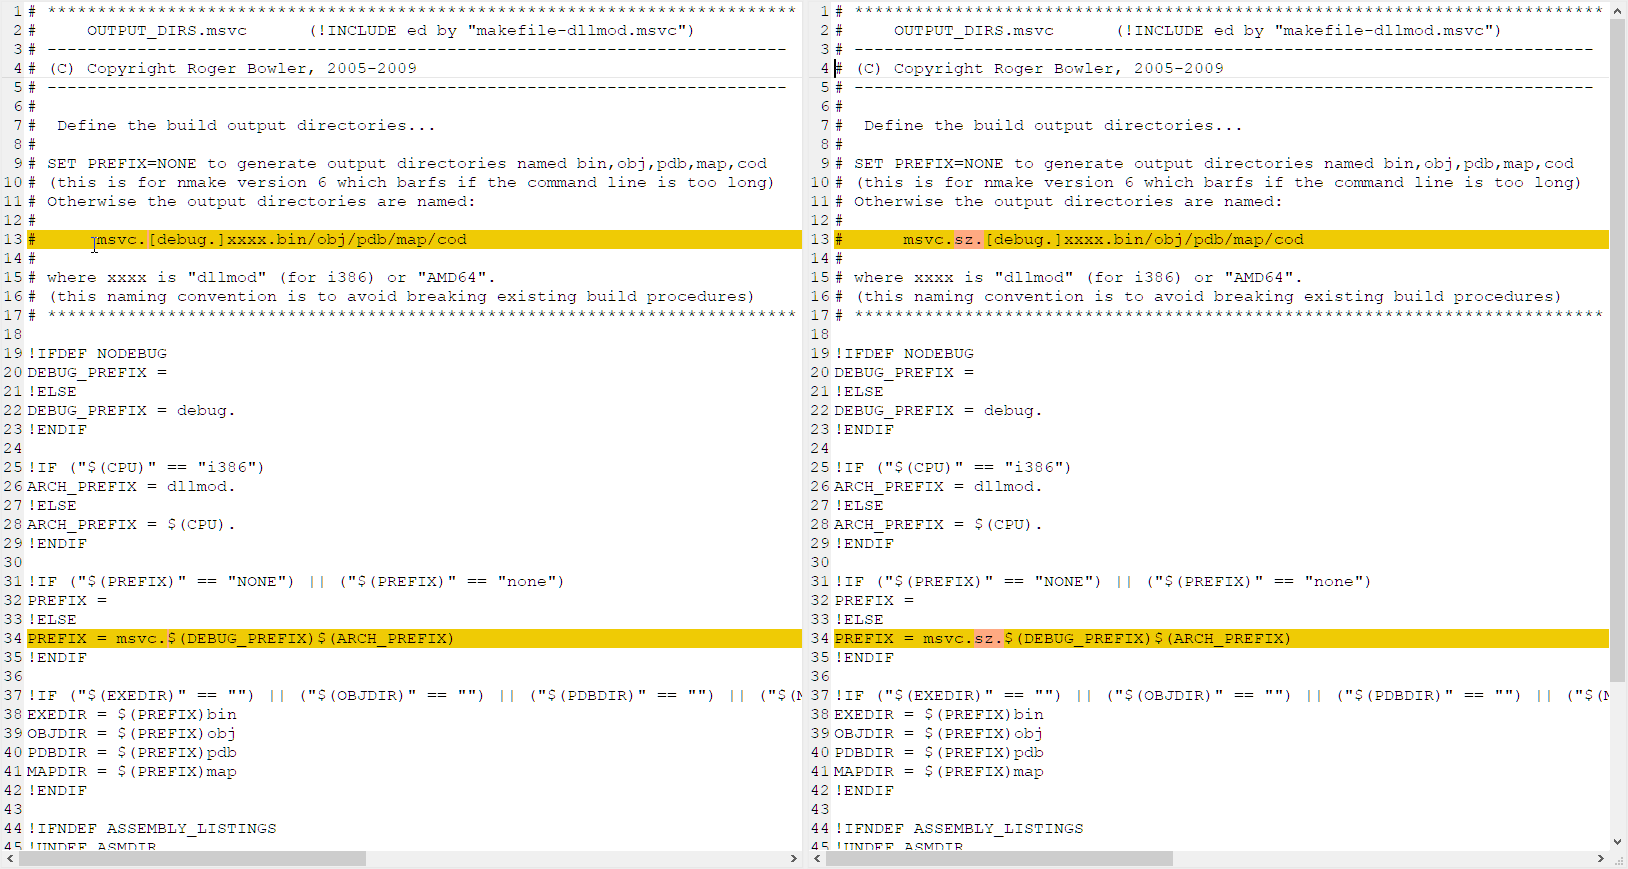
(6.A) Modify OUTPUT_DIRS
To ensure that MSBuild generates outputs to the proper isolated directories - the following modifications MUST be made to the following file:
Building Hercules using the Visual Studio ''makefile.bat''
Once you have installed Microsoft's Visual Studio 2019 Community Edition and have finished setting up the build environment, you can then easily build Hercules via the provided Visual Studio solution and project files included as part of the Hercules source-code distribution.
That's it!
NOTE: When using the IDE, clicking the “Rebuild Solution” button in Visual Studio simply invokes Hercules's “makefile.bat” script, which in turn invokes thenmakecommand for the make file calledmakefile.msvcormakefile.sz.msvc(after calling a few helper batch scripts to first define the Visual Studio build environment).
All of the actual building (compiling and linking) is controlled by the “makefile.msvc” make file (which, as explained, is invoked automatically by Visual Studio when you click the “Rebuild Solution” button).